1-4 DAYS DELIVERY
D-Craft
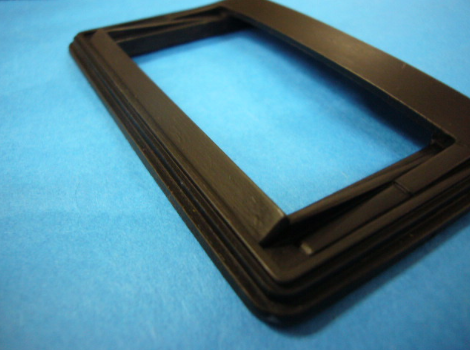
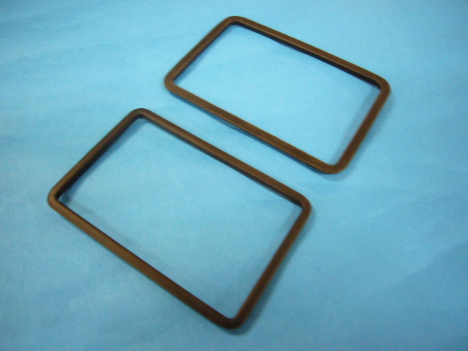
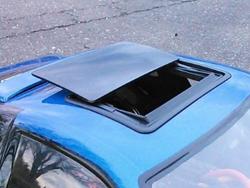
Realistic Plastic Sliding Sun Roof Kit (60mmx86mm) DC6 [D-Craft] DC-6
$14.99
In Stock
Pre-Order
Sold out
SKU: DC-6
SKU: DC-6
Categories: Body Accessories, Lexan Parts / Flares / Splitters
100% ORIGINAL AND QUALITY
24 MONTHS GUARANTEE
- Description
- Reviews
Realistic Plastic Sliding Sun Roof Kit (60mmx86mm) [D-Craft] DC-6
Universal Sun Roof Kit:
60MM wide x 86MM long
This will make your body 3D and realistic. You will need to paint and either use Shoe Goo or double sided tape to stick this on your body. This is UNIVERSAL FIT, you will have to figure it out, or read a writeup on how to get it to work on your particular body.
People have been successful using this product on other bodies besides the one it was meant for.
Body sold separately.
Instructions TRANSLATED:
Let's get started.

First of all, open the real opening body

Position it on the roof.

Once you've decided the position, put a line along the rim with an oil pen etc.
This line becomes a cut line.
Dimensionally it is a rectangle of about 80 mm × 50 mm.

If positioning is OK, make a hole with a reamer or the like so as to match the 4 corner radius.
It is okay if you extend the hole as thin lines disappear.
It is not necessary to become severe as it will be invisible.
Finally I will make a big hole in the middle.

Put the cutter in the line of 4 sides.
This is also an image that cuts the outside of the line if it is a thin line.
Let's divide it a few times lightly rather than cutting it all at once.
There is no need to cut deeply.
Pay attention to the handling of the cutter.

Put the scissors in the hole in the middle

Cut it like folding inward.
This soarer body was hard to fold because the polyka was quite thick.

If you take in a file such as Bali, you will have a mall


I will install it.
If you do not enter, please scrape off the hit parts.
Let's check it as the mall will float when there is another balance.

If this is OK, you can use this fixed frame

Pour in from the inside into the mall.

While sandwiching the mall by hand so that the mall is in close contact with the roof, instantaneously point the
four corners of the rounded portion with an adhesive.
The mall will fit the roof surface with this.

Next,

Install from the inside.
If there are interfering parts, please scrape.

If it is OK also fix the instantaneous adhesive flowing to the four corners.
If you reinforce further with shougou etc it is perfect.

Finally the roof glass.
Because it is made of resin, there is not much gloss. I think that polishing beautifully with a
compound etc. or
sticking a transparent sheet such as a margin part of a sticker makes it like glass.
Although it is high in difficulty, it is also ant to cut the roof to this shape and install it.

Finally fix the glass with double sided tape !
It is also good to modify the thickness of double-sided tape and angle it.


Installation complete!
Universal Sun Roof Kit:
60MM wide x 86MM long
This will make your body 3D and realistic. You will need to paint and either use Shoe Goo or double sided tape to stick this on your body. This is UNIVERSAL FIT, you will have to figure it out, or read a writeup on how to get it to work on your particular body.
People have been successful using this product on other bodies besides the one it was meant for.
Body sold separately.
Instructions TRANSLATED:
Let's get started.

First of all, open the real opening body

Position it on the roof.

Once you've decided the position, put a line along the rim with an oil pen etc.
This line becomes a cut line.
Dimensionally it is a rectangle of about 80 mm × 50 mm.

If positioning is OK, make a hole with a reamer or the like so as to match the 4 corner radius.
It is okay if you extend the hole as thin lines disappear.
It is not necessary to become severe as it will be invisible.
Finally I will make a big hole in the middle.

Put the cutter in the line of 4 sides.
This is also an image that cuts the outside of the line if it is a thin line.
Let's divide it a few times lightly rather than cutting it all at once.
There is no need to cut deeply.
Pay attention to the handling of the cutter.

Put the scissors in the hole in the middle

Cut it like folding inward.
This soarer body was hard to fold because the polyka was quite thick.

If you take in a file such as Bali, you will have a mall


I will install it.
If you do not enter, please scrape off the hit parts.
Let's check it as the mall will float when there is another balance.

If this is OK, you can use this fixed frame

Pour in from the inside into the mall.

While sandwiching the mall by hand so that the mall is in close contact with the roof, instantaneously point the
four corners of the rounded portion with an adhesive.
The mall will fit the roof surface with this.

Next,

Install from the inside.
If there are interfering parts, please scrape.

If it is OK also fix the instantaneous adhesive flowing to the four corners.
If you reinforce further with shougou etc it is perfect.

Finally the roof glass.
Because it is made of resin, there is not much gloss. I think that polishing beautifully with a
compound etc. or
sticking a transparent sheet such as a margin part of a sticker makes it like glass.
Although it is high in difficulty, it is also ant to cut the roof to this shape and install it.

Finally fix the glass with double sided tape !
It is also good to modify the thickness of double-sided tape and angle it.


Installation complete!


![SILVER Mini Self Tapping Lexan Body Micro Screws (100pcs) [Scale Reflex] 700630S](http://supergdrift.com/cdn/shop/files/minisilver_{width}x.jpg?v=1726937567)


